


To tighten a kitchen faucet, secure the nut under the sink using a basin wrench or a similar tool. Always turn off the water supply before attempting any repairs.
Maintaining a firm kitchen faucet is essential for efficient kitchen operations and to prevent leaks or water damage. A loose faucet can be a nuisance and, over time, might lead to more significant plumbing issues. Addressing this common household problem requires only a few tools and a bit of know-how.
DIY enthusiasts and homeowners alike will appreciate this quick fix as a cost-saving skill. Ensuring that your kitchen faucet is tightly secured not only helps in its functionality but also extends its lifespan. Our step-by-step guide will make this task straightforward, providing the necessary insights to keep your kitchen faucet operating smoothly.
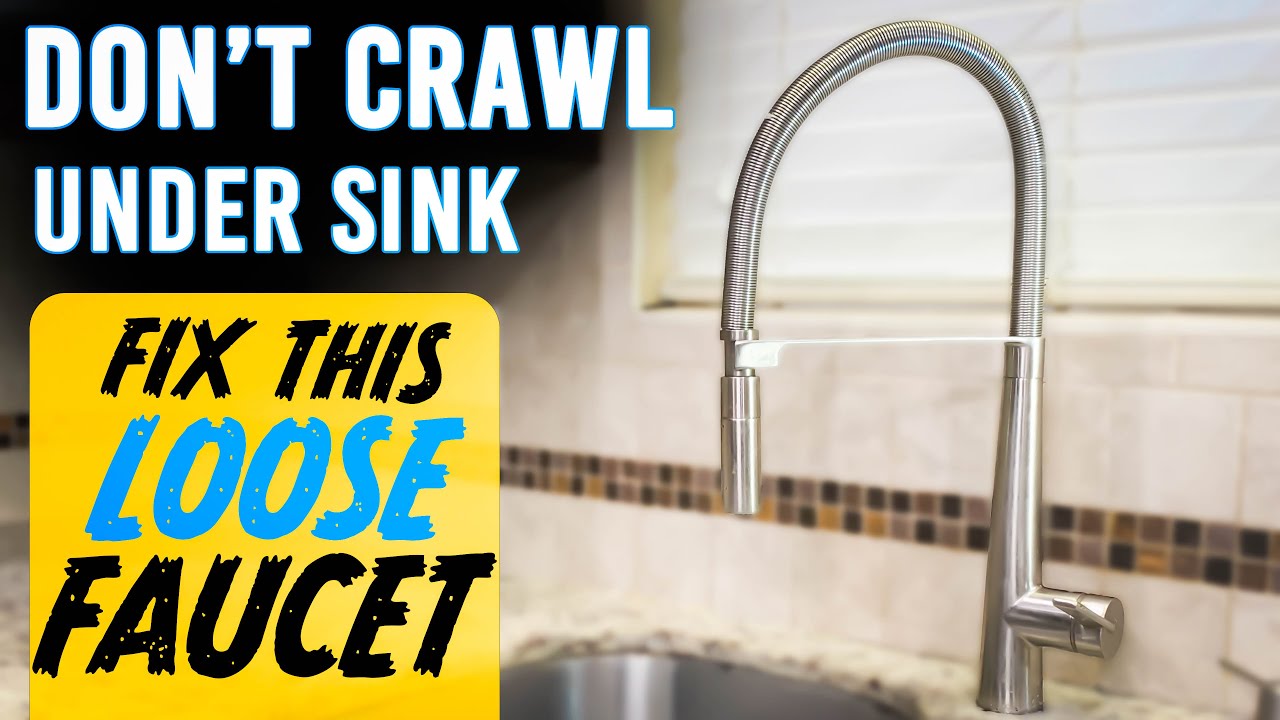
Credit: www.youtube.com
Symptoms Of A Loose Kitchen Faucet
Noticing a loose kitchen faucet is not always obvious. Pay close attention to how it feels and sounds during use. Understanding these symptoms ensures timely maintenance. Let’s explore the signs of a faucet that needs tightening.
Wobbling And Movement
A steady faucet shouldn’t move. If you sense wobbling when touched or witness any flex during operation, it’s a red flag.
- Handle feels unsteady
- Spout moves
- Base shifts on countertop
Unusual Noises During Use
Creaking or grinding sounds are telltale symptoms. A sound faucet operates quietly. Any new, unusual noise suggests internal loosening.
- Squeaking when swiveling the spout
- Clicking sounds when turning handle
- Grinding noises during use
Safety Precautions Before You Start
Before diving into the task of tightening a kitchen faucet, prioritizing safety is essential. Incorrect handling can lead to water damage or personal injury. Adhere to these safety tips to ensure a smooth and secure process.
Turning Off Water Supply
Begin by shutting off the water supply to your kitchen faucet. This prevents any unexpected water flow during repairs, protecting you and your kitchen from potential water damage. Look for the valves beneath the sink and turn them clockwise until fully closed. Always check the faucet to ensure no water comes out before continuing with your work.
Gathering Necessary Tools
Having the right tools at hand is crucial for tightening a faucet correctly. You will need:
- Adjustable wrench
- Basin wrench for hard-to-reach nuts
- Plumber’s tape to secure connections
- Clean rags to clear any debris
- Flashlight if additional lighting is needed
Prepare this toolkit in advance to ensure a seamless repair journey. Keep all tools within reach to maintain an organized workspace and prevent unnecessary movements during the process.
Identifying The Type Of Faucet
Before you can tighten a kitchen faucet, you need to know what type you have. The faucet design is key to understanding how to approach the fix. Let’s find out what kind of faucet graces your sink.
Understanding Faucet Design
Faucets come in many shapes and sizes. But they all have two things in common: a handle and a spout. Some have one handle. Others have two. The handle connects to parts inside. These parts need to be tight so the faucet works right.
- Single-Hole: These faucets have one handle and one spout.
- Centerset: They have two handles and one spout. All parts are close together.
- Widespread: Like centerset but spread out. Each part has its own hole in the sink.
- Wall-Mounted: Fixed to the wall, not the sink. They go above the sink.
Common Brands And Models
Several brands lead the faucet game. Their designs might look alike. But each has unique features. Knowing your faucet’s brand helps with the right fix.
| Brand Name | Popular Models |
|---|---|
| Delta | Leland, Trinsic, Valdosta |
| Moen | Adler, Arbor, Essie |
| Kohler | Simplice, Forte, Bellera |
| Kraus | Oletto, Bolden, Artec |
Each brand has its manuals online. Find yours to know your faucet better. This will make your job easier. Remember to keep track of each step as you work.
Step-by-step Faucet Tightening Process
A loose kitchen faucet can turn everyday kitchen tasks into a frustrating ordeal. Tightening your kitchen faucet is a simple DIY task that requires minimal tools and time. Here’s a straightforward method to secure your wobbly faucet in no time.
Removing Decorative Elements
Before tightening the faucet, remove any decorative parts. This normally includes caps or covers that hide the screws.
- Turn off the water supply to the faucet.
- Check for a decorative cap on the faucet handle.
- Use a flat screwdriver to gently pry off the cap.
- Keep these small parts in a safe place.
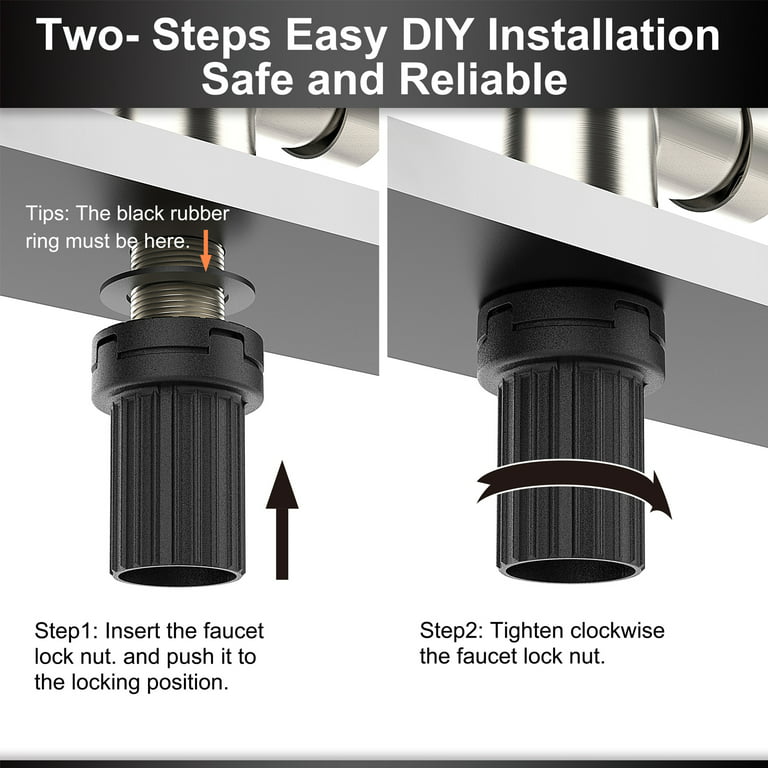
Tightening The Nut Or Screws
Underneath the decorative elements, you’ll find a nut or screws holding the faucet in place. Use a wrench or a screwdriver to tighten them.
- Locate the nut beneath the sink, at the faucet’s base.
- Adjust your wrench to fit the nut’s size.
- Turn the wrench clockwise to tighten the nut securely.
- Do not over-tighten, as this can damage the faucet or sink.
Reassembling The Faucet
After securing the faucet base, reassemble any handles or decorative elements.
- Place the handle back on the faucet stem.
- Secure it with the screw previously removed.
- Pop the decorative cap back into place.
- Turn on the water supply and test the faucet for stability.
“`
This template provides a clear, concise guide to tightening a kitchen faucet, split into logical steps under appropriate headings. The use of lists ensures readability, and the straightforward language helps in understanding and performing each task confidently.
Troubleshooting Common Issues
Troubleshooting common issues with a loose kitchen faucet can be a simple DIY fix. Tools needed often include an adjustable wrench, screwdrivers, and perhaps some penetrating oil. Keep in mind that different faucets may require different approaches. Here’s how you can address some typical problems:
Dealing With Stripped Screws
Stripped screws can halt your repair progress. Follow these steps:
- Identify the stripped screw.
- Apply penetrating oil to ease removal.
- Use a manual screw extractor.
- Replace with new screws if necessary.
Correcting Alignment Problems
A misaligned faucet can cause uneven wear. The solution involves:
- Turning off the water supply.
- Loosening the set screws.
- Repositioning the faucet.
- Retightening screws firmly.
- Testing the faucet for proper alignment.
:max_bytes(150000):strip_icc()/woman-fixing-sink-de54d945295a438c86072f78415c3e0e.jpg)
Credit: www.realsimple.com
Maintaining Your Kitchen Faucet For Longevity
Maintaining your kitchen faucet not only prolongs its life but also ensures smooth functionality. A tight faucet handle or a steady leak can be a nuisance. With proper maintenance, these issues can become less frequent. Simple routine checks and knowing when to call a professional can save time and money.
Routine Checks
- Inspect for leaks – Regularly look under the sink and around the faucet for any signs of water.
- Examine the handle – Make sure it turns smoothly without resistance. Tighten if necessary.
- Audit the water flow – A consistent stream signifies a clear aerator, while sputtering indicates it may need cleaning.
Checking hose connections and replacing worn-out seals can prevent future problems. Set a reminder to perform these checks every few months.
When To Call A Professional
| Symptom | Potential Issue | DIY or Professional |
|---|---|---|
| Persistent dripping | Damaged valve seat | Professionals often better suited |
| Water discoloration | Corroded pipes | Professionals needed to replace pipes |
| Loud noises | Loose parts | Simple tighten or professional if persists |
Professional help is critical when problems persist after initial fixes or when you’re unsure about the problem. They have tools and expertise to handle complex issues quickly and effectively.
Credit: www.walmart.com
Frequently Asked Questions On How To Tighten Kitchen Faucet
How Do You Tighten A Kitchen Faucet Tap?
To tighten a kitchen faucet tap, first, shut off the water supply. Then, locate the screw under the faucet’s cap; use an Allen key or screwdriver to tighten it. Secure the handle and test the tap for stability.
Is There A Tool To Tighten Kitchen Faucet?
Yes, a basin wrench is a specialized tool designed to tighten kitchen faucets in hard-to-reach places under the sink.
How Do You Tighten A Faucet Nut?
Turn off the water supply before starting. Slide a basin wrench up to the faucet nut and fit it onto the nut. Turn the wrench handle clockwise to tighten the nut securely. Check for leaks once you restore the water supply.
How Do You Fix A Tight Kitchen Faucet Handle?
Turn off the water supply. Loosen the set screw and remove the faucet handle. Inspect for mineral buildup or damaged parts. Clean or replace as needed. Reassemble the handle and turn the water back on to test functionality.
Conclusion
Tightening a kitchen faucet can be a simple, rewarding DIY task. With the right tools and guidance, you can achieve a stable and leak-free sink. Remember to shut off the water supply and double-check connections! For more handy tips, explore our blog — your go-to resource for effortless home maintenance.


