


To remove paint from kitchen cabinets, use a chemical paint stripper or sanding method. Ensure the area is well-ventilated and you wear protective gear for safety.
Revamping your kitchen by removing old, chipped, or outdated paint from your cabinets can instantly uplift the appearance of your space. This process, when done accurately, not only enhances the overall aesthetic but also increases the lifespan of your cabinetry.
Preparing your kitchen for a fresh coat of paint requires patience and attention to detail, ensuring that all surfaces are clean and smooth for the best results. With the right tools and techniques, this DIY task can be both cost-effective and rewarding, giving your kitchen a professional-looking finish. Choosing the correct method to strip paint will depend on the type of paint and cabinet material, making it crucial to assess your cabinets before starting the removal process.
Introduction To Diy Paint Removal
Are you eyeing those old kitchen cabinets and wishing for a fresh look? DIY paint removal can be satisfying and budget-friendly. This project might be perfect for you. Learn how to strip that old paint and give your kitchen a brand-new feel!
The Urge To Revamp Your Kitchen
Transforming your kitchen starts with removing old paint. It’s a big task. But, with the right tools and directions, you can do it. Picture your kitchen with a new paint job. It’s worth the effort! Let’s guide you through this exciting journey.
Safety First: Preparing For The Project
Before starting, prioritize safety. Paint removal involves chemicals and scrapers. You need to be careful. Protect yourself. Follow these safety steps:
- Wear protective gear: gloves, goggles, and a face mask.
- Work in a ventilated area: open windows or use a fan.
- Read instructions: understand the paint stripper you’re using.
After prepping, gather your tools. Start with scrapers, sandpaper, and chemical strippers. Ensure everything is ready. Your safety and preparation set the stage for a successful paint removal job!
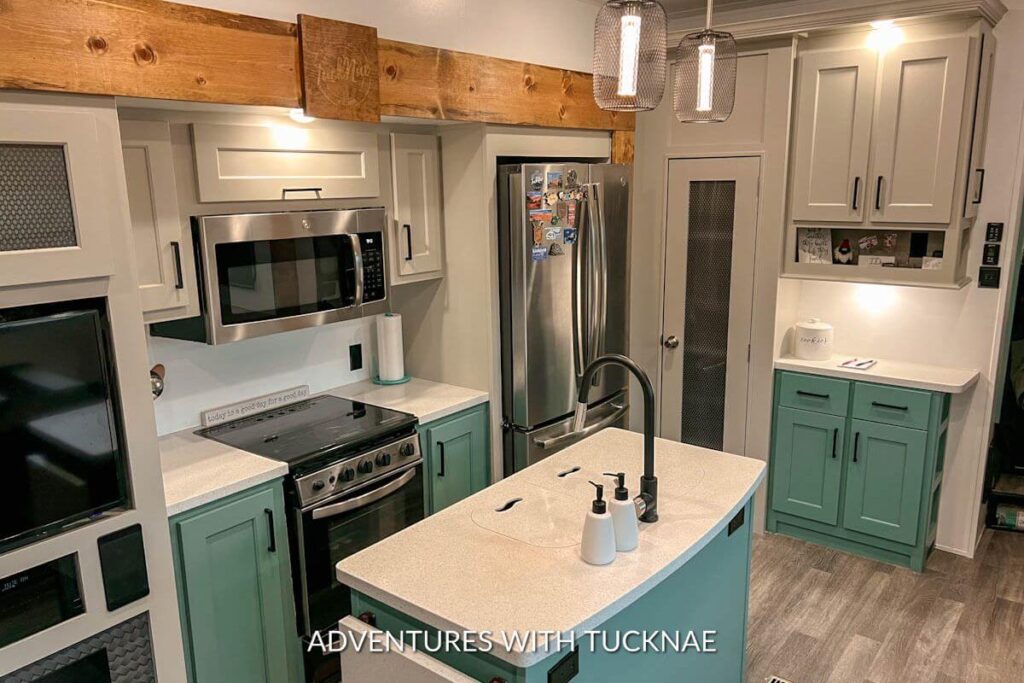
Credit: adventureswithtucknae.com
Selecting The Right Tools
Removing paint from kitchen cabinets can be a breeze with the proper tools. Essential to any paint stripping project, picking the right tools can save time and protect your cabinets from damage. Let’s dive into the must-have tools for a successful paint removal job.
Scraper Essentials
Scraper tools are the frontline warriors in paint removal. Select a scraper with a firm handle and a flexible blade for precision work. A metal putty knife works best for chipping away at stubborn paint. For delicate surfaces, a plastic scraper reduces the risk of gouging the wood.
- Metal Putty Knife: Ideal for tough paint.
- Plastic Scraper: Safer for gentle scraping.
Chemical Strippers Vs. Natural Solutions
In the quest to remove paint, chemical strippers are fast-acting and powerful. Yet, they contain strong odors and chemicals that require careful handling. Natural solutions like vinegar or baking soda mixtures offer a gentler approach, suitable for health-conscious individuals and the environment.
| Type | Pros | Cons |
|---|---|---|
| Chemical Strippers | Effective; Saves time | Contains harsh chemicals |
| Natural Solutions | Eco-friendly; Milder | May require more elbow grease |
Protective Gear And Why It Matters
Equipping yourself with protective gear is non-negotiable. Safety glasses shield your eyes from splatters. Gloves protect your hands from chemicals or abrasive materials. Donning a mask prevents inhalation of harmful fumes, especially when working with chemical strippers.
- Safety Glasses: Protect eyes from splatters.
- Gloves: Shield hands from harmful substances.
- Mask: Prevent inhalation of fumes.
Remember to work in a well-ventilated area to further ensure safety during your paint removal project. With the right tools and precautions, your kitchen cabinets will be ready for a fresh new look in no time!
Preparing Your Work Area
Before tackling the task of removing paint from kitchen cabinets, setting up a proper work area is crucial. This initial step ensures safety, efficiency, and cleanliness throughout the process. Get ready for a mess-free, well-ventilated workspace that allows you to remove paint with ease.
Clearing And Covering Surfaces
First things first: clear the space. Remove all kitchenware, appliances, and detach drawers and doors from the cabinets. Next, cover the countertops, floors, and any remaining fixed surfaces with drop cloths or plastic sheeting. This will protect against accidental spills and drips.
- Move items to another room
- Use tape to secure covers
- Label cabinet parts if needed
Ensuring Adequate Ventilation
Paint removers can be potent. That’s why adequate ventilation is a must. Open windows and use fans to keep air circulating. This will also help to reduce fumes and potential health risks. A well-ventilated area ensures a safer environment to work in.
- Open all possible windows
- Set up portable fans facing outwards
- Wear protective gear like masks
Organizing Your Materials
Last but not least, organize your tools and materials. Have your paint stripper, scraper, gloves, and brushes readily accessible. Keep them on a separate tarp or tray to prevent damage to other surfaces. This organization saves time and helps you stay focused on the task.
| Tool/Material | Storage Spot |
|---|---|
| Paint Stripper | Separate tray |
| Scraper | Toolbox |
| Gloves | Workbench |
| Brushes | Plastic tub |
The Step-by-step Removal Process
Ready to revive your kitchen cabinets? Stripping old paint
can bring a fresh look to the heart of your home. Follow these steps carefully
for a smooth, paint-free surface.
Applying The Paint Stripper
Proper preparation ensures a safe and effective paint removal process.
Wear protective gear like gloves and goggles. Ventilate the area by opening windows
or using fans.
- Choose a paint stripper suitable for your cabinet’s surface.
- Apply a thick layer of stripper with a brush, covering the painted areas evenly.
- Let it sit according to the product’s instructions, usually 15-30 minutes.
Gentle Scraping Techniques
After the stripper softens the paint, it’s time to scrape it off. Be gentle to avoid damage.
- Use a plastic scraper for softened paint.
- Scrape along the grain of the wood, not against it.
- Remove paint in small sections to maintain control.
Dealing With Stubborn Paint Residue
Sometimes, paint clings on. Patience and the right tools make all the difference.
- For remaining spots, reapply paint stripper and wait a few minutes.
- Use steel wool for hard-to-reach areas, rubbing gently.
- Wipe the wood clean with a damp cloth to remove all residue.
Cleanup And Cabinet Care
After removing paint, caring for your kitchen cabinets is crucial. Setting the stage for a pristine and safe kitchen environment means addressing the disposal of hazardous materials, smoothing the wood surface, and implementing routine care. This section ensures a professional touch to maintain the longevity and beauty of the cabinets.
Disposing Of Hazardous Materials
Proper disposal of paint and chemicals protects both you and the environment. Local regulations can vary, so it’s important to check guidelines. Most communities offer designated drop-off sites for items like paint thinners and strippers.
- Seal containers tightly.
- Mark them as “hazardous”.
- Transport safely to a disposal site.
Sanding For A Smooth Finish
Sanding wood ensures a smooth base for new paint or finish. Start with a coarse grit and work to a finer grit. Always sand in the direction of the wood grain to avoid scratches.
| Step | Tool | Grit |
|---|---|---|
| 1. Initial smoothing | Sander or sandpaper | Coarse (60-80) |
| 2. Intermediate | Sander or sandpaper | Medium (120-150) |
| 3. Final smooth | Sander or sandpaper | Fine (180-220) |
Tips For Maintaining Wood Surfaces
Keeping your wood cabinets in top condition calls for regular maintenance and delicate cleaning. Use a damp cloth and mild detergent to wipe surfaces without damaging the wood.
- Clean spills immediately with a soft cloth.
- Avoid harsh chemicals that can strip the finish.
- Use beeswax or oil for a natural shine.
- Inspect hinges and hardware periodically.

Credit: littleterracedhouse.com
Finishing Touches
Once you’ve removed the old paint, it’s all about the refinishing to bring life back to your kitchen cabinets. The finishing touches will not only transform their look but will also protect them for years to come. Let’s guide you through choosing the right finish, applying it, and putting all the pieces back together for a kitchen that shines.
Choosing The Right Paint Or Stain
The final look of your kitchen cabinets largely depends on the type of paint or stain you select. Choose a color that matches your home’s style and personality. For a traditional look, stains are ideal. They enhance the wood’s natural beauty. On the other hand, paints are great for a modern, clean look. Here’s what you should consider:
- Durability: Pick a finish that can handle daily kitchen activities.
- Ease of application: Some finishes are easier to apply than others.
- Drying time: Make sure it fits your renovation schedule.
- Maintenance: Some finishes need more upkeep. Choose wisely.
Applying The New Finish
The right application is key to a professional-looking finish. Start by preparing your workspace and wear the appropriate protective gear. For an even application, use quality brushes or a roller suitable for the type of finish you chose. Apply the finish in thin, even coats, and allow sufficient drying time between coats. This might take patience, but the result is worth it.
Avoid streaks and drips for a flawless appearance. Use a light to check for missed spots. Once done, give everything a good day to cure before reassembling.
Reassembling Hardware And Fixtures
The reassembly is the final step in the journey of renewing your kitchen cabinets. First, make sure everything is dry to the touch. Then, carefully reattach all hardware and fixtures. Start with the hinges and doors, followed by drawer pulls and knobs. Here’s an easy step-by-step process:
- Align the doors and secure the hinges.
- Attach drawer pulls or knobs.
- Check alignment and make adjustments.
For a finish as good as new, align the doors and drawers correctly and ensure all moving parts operate smoothly. Tighten all fittings but avoid over-tightening, as this can damage the fresh finish. With these finishing touches, your kitchen cabinets will look stunning and function perfectly.
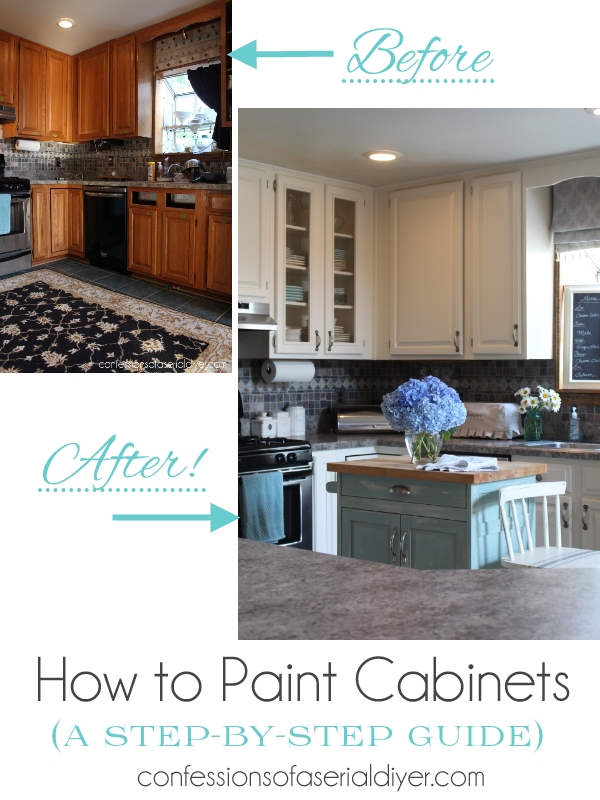
Credit: www.confessionsofaserialdiyer.com
Frequently Asked Questions For How To Remove Paint From Kitchen Cabinets
What Is The Easiest Way To Remove Paint From Kitchen Cabinets?
The easiest way to remove paint from kitchen cabinets is by using a chemical paint stripper, applying it evenly, and then gently scraping the paint off after it bubbles. Always wear protective gear and work in a well-ventilated area.
Is It Better To Strip Or Sand Kitchen Cabinets?
Stripping is better for detailed or intricate cabinets, while sanding suits flat surfaces. Consider the cabinet’s condition and paint type before deciding.
What Is The Best Paint Remover For Cabinets?
The best paint remover for cabinets is a citrus-based stripper, which is effective yet gentle on the wood.
How Do You Remove Old Finish From Kitchen Cabinets?
To remove old finish from kitchen cabinets, gently sand the surface or apply a chemical stripper. Wipe away residue with a clean cloth, then let the cabinets dry completely.
Conclusion
Revamping your kitchen cabinets by removing old paint can be a rewarding DIY project. With the right tools and techniques shared here, achieving a beautiful, fresh finish is within reach. Remember, safety and patience are key — take your time for a job well done.
Ready for the next step? Your newly prepped cabinets await their transformation!


