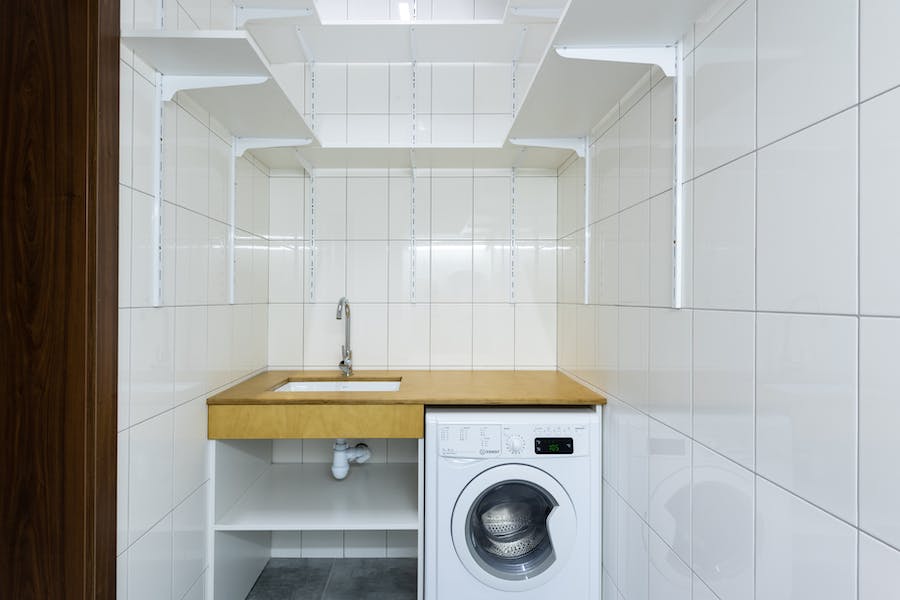
To plumb a washing machine drain, connect the machine’s hose to a dedicated drainage system. Ensure the hose has a trap and proper ventilation to prevent backflow.
Plumbing a washing machine drain requires precision and understanding of your home’s drainage system. A well-installed drain safeguards against water damage and keeps the appliance functioning correctly. Homeowners and DIY enthusiasts must gather the necessary tools, follow local building codes, and ensure a secure fit to avoid leaks.
By focusing on a proper installation from the start, you’ll protect your floors and walls from potential water damage, and facilitate a sanitary environment for your laundry processes. An effective drainage setup helps maintain your washing machine’s efficiency and longevity, making it a crucial aspect of laundry room maintenance. Always ensure you have the correct measurements and materials before starting to guarantee a seamless installation.
Essential Tools And Materials
Embarking on a DIY plumbing project for your washing machine drain is a rewarding endeavor. Ensuring you have the right tools and materials is crucial to a successful installation. This guide highlights everything you’ll need to plumb your washing machine drain like a pro.
Tools To Get Started
A good set of tools is the backbone of any plumbing project. Below is a list of essential tools you can’t do without:
- Pipe cutter – for precise cuts on your piping
- Adjustable wrench – to secure fittings and fixtures
- Pliers – for a better grip on pipes and parts
- Tape measure – accuracy is key for proper installation
- Level – ensures that your pipes run straight
- Pipe wrench – for turning and holding pipes
Necessary Pipe Materials
The right materials will keep your drain working for years. Here’s what you will need:
| Material | Use |
|---|---|
| PVC pipes | Main drain line |
| PVC elbows | Angular connections |
| PVC solvent | Bonding pipes |
| P-trap | Preventing odor |
| Hose clamps | Securing drain hose |
| Standpipe | Supports drain hose |
Safety Gear
Safety cannot be overlooked while working on plumbing tasks. Protect yourself with:
- Safety glasses – shield your eyes from debris and spills
- Work gloves – protect your hands from sharp edges and chemicals
- Close-toed shoes – to keep your feet safe
Preparing The Laundry Space
Welcome to ‘Preparing the Laundry Space’ – a vital first step in the journey to plumb a washing machine drain. Before diving into the intricacies of plumbing, it’s essential to prep your laundry area. Ensuring this space is ready will streamline the installation process and help prevent any future issues.
Locating The Drainage Point
Identify the designated drain hookup for your washing machine. This will typically be a standpipe, a laundry sink, or a floor drain. Ensure it’s within reach of the washing machine’s hoses. Use a measuring tape to check the distance and consider the route your drain hose will take, keeping it free from sharp bends to maintain a smooth water flow.
Clearing And Cleaning The Area
- Remove any items that might obstruct access to the drainage point.
- Sweep and clean to prevent dirt from entering the plumbing.
- Check the area for sharp objects that could damage hoses.
Verifying Nearby Water Inlets
Alongside the drainage, water inlets are crucial. Check they are functioning and easily accessible. Ensure hot and cold faucets are labeled correctly to avoid confusion during the washing machine setup. If they need servicing, address this before you begin.
Understanding The Plumbing Requirements
Understanding the plumbing requirements for your washing machine drain is a key step to ensure trouble-free installation. Proper setup of the drain is vital. It will prevent leaks and backflows. It will adhere to local codes for safety and functionality.
Standard Drain Specifications
Every washing machine needs a reliable drain. It uses specific size and shape standards. A typical drain setup includes:
- The standpipe height should not exceed 96 inches.
- The minimum diameter for the pipe is 2 inches.
- Air gaps must prevent siphoning and backflow.
- Securely strap the hose to the standpipe.
Building Code Considerations
Local building codes govern plumbing installations. They ensure safety and effectiveness. Some common requirements include:
- A P-trap installation prevents sewer gas from entering the home.
- Venting is necessary to maintain proper drainage flow.
- Access to cleanouts for maintenance should be easy.
Contact local authorities for specific codes. It will ensure your installation meets all the required legal parameters.

Credit: www.homedepot.com
Installation Steps
Welcome to the step-by-step guide on how to plumb a washing machine drain. Having the right setup for your washing machine’s drainage will ensure it functions correctly and efficiently. This section focuses on essential installation steps to achieve a reliable drain for your appliance. Follow these instructions, and you’ll have your washing machine’s plumbing ready in no time.
Measuring And Cutting Pipes
Start by determining the length of the pipe needed for your setup. Measure carefully from the P-trap to where your machine will sit. Once you’ve noted the measurement, mark it clearly on the pipe. Use a pipe cutter or a hacksaw to make a clean cut. Double-check the fit to ensure accuracy. Remember to always prioritize safety and wear protective eyewear during this process.
Connecting Pipes To The P-trap
Connecting to the P-trap is a critical step. Begin by cleaning the ends of cut pipes. Apply PVC primer and cement to bond them securely. Fit the pipe into the P-trap and twist slightly to ensure a strong connection. Allow sufficient time for the cement to set before moving on to avoid potential issues.
Securing The Standpipe
The standpipe holds the drain hose and must be stable. Secure it to the wall or a sturdy support using pipe straps. Ensure the standpipe is at least 18 inches high but not over 30 inches to maintain the necessary water seal. Check that the standpipe does not lean or wobble to prevent future mishaps.
Testing For Leaks
Run your washing machine to test the new plumbing. Look for any droplets or moisture around the pipes and connections. If you notice dampness or actual water dripping, you need to retighten or reseal the fittings. Conducting this test ensures your installation is watertight and avoids water damage down the line.
Grab your tools and get ready to give your laundry room a plumbing upgrade. Properly installing your washing machine drain is not just about following steps; it’s ensuring your home stays safe from water damage.
Troubleshooting Common Issues
Got a washing machine drain that’s not acting right? No need to call a plumber just yet! Many issues with washing machine drains can be fixed at home with simple tools. Let’s dive into common problems and how to fix them.
Addressing Water Backup
Water backup in a washing machine drain can be a hassle. It’s often caused by a blockage somewhere in the line. Here’s a straightforward guide to tackle it:
- Turn off your washing machine to prevent more water from complicating the issue.
- Clear the drainpipe. Sometimes, it’s as simple as a clog that needs a good plunge.
- If plunging doesn’t work, use a plumber’s snake to remove deeper blockages.
- After clearing the clog, run an empty hot water cycle to flush any remaining debris.
Fixing Leaks
Leaks can cause damage if not addressed quickly. Check the following to fix leaks from your washing machine drain:
- Inspect the hose connections. Tighten any loose clamps or replace worn-out hoses.
- Examine the standpipe. It should be free of cracks or damage.
- Check the washer’s seals and gaskets, replacing any that show signs of wear.
Ensuring Proper Venting
Proper venting is crucial for a washing machine to drain correctly. It prevents vacuum issues that can disrupt water flow. Follow these steps for correct venting:
| Step | Action |
|---|---|
| 1 | Verify the venting system’s clear and complies with local codes. |
| 2 | Ensure the vent pipe’s at least 1.5 inches in diameter to avoid blockages. |
| 3 | Check for any bends in the vent that could impede airflow. |

Credit: www.homedepot.com
Maintenance Tips
Keeping a washing machine drain in top shape is essential. It ensures efficient functionality. Lack of maintenance can lead to clogs and water damage. Now, let’s explore how you can maintain your washing machine drain with ease.
Regular Cleaning Recommendations
Regular cleaning prevents buildup and keeps the drain working smoothly. Incorporate these steps into your cleaning routine:
- Monthly Cleanings: Run an empty hot water cycle with vinegar. It helps to remove detergent residue and mineral deposits.
- Check Drain Filter: Clean it every month to prevent lint and small items from clogging the drain.
- Inspect Hoses: Look for kinks, cracks, or bulges. Straighten or replace as needed.
When To Replace Parts
Parts wear out over time. Here’s when to consider replacements:
| Part | Lifespan | Signs of Wear |
|---|---|---|
| Hoses | 3-5 years | Creaking, leaks, or visible damage |
| Drain Pump | 5-7 years | Noise, error codes, or water not draining |
Professional Help Vs. Diy
Determine your comfort level with maintenance tasks. Basic cleaning is a DIY. But for complex issues:
- Reach out to a professional if you’re unsure about a repair.
- Education is key. Watch tutorials for simple fixes.
- Know your limits. Avoid further damage by calling a pro when needed.

Credit: www.amazon.de
Frequently Asked Questions On How To Plumb A Washing Machine Drain
How Should A Washing Machine Waste Be Plumbed In?
Connect the washing machine’s waste hose to a dedicated waste pipe or a spigot on the sink’s P-trap. Ensure the waste is higher than the machine’s drum to prevent backflow. Use a U-bend to prevent odors and secure the hose with clips to avoid dislodgment.
How Should Washing Machine Drain Pipe Be Installed?
Ensure the washing machine drain pipe is elevated at least 34 inches above the floor. Secure it to a utility sink or standpipe with a proper P-trap. Keep the hose loose to avoid siphoning. Always consult the manufacturer’s instructions for optimal installation.
Does A Washing Machine Drain Pipe Need A Trap?
Yes, a washing machine drain pipe requires a trap to prevent sewer gases from entering the home and to maintain proper drainage function.
Can I Plumb In A Washing Machine Myself?
Yes, you can plumb in a washing machine yourself if you have basic DIY skills and follow the manufacturer’s instructions. Ensure you shut off the water supply and prepare the necessary tools before starting.
Conclusion
Wrapping up, mastering the plumbing of a washing machine drain can save you both time and money. By following the steps outlined, you’ll ensure efficient water flow and prevent potential leaks. Embrace this DIY skill to keep your home running smoothly.
Remember, correct installation is key to avoiding costly repairs. Ready to tackle your next home project?


