


To install Durock, first ensure a flat, clean surface and then secure the panels with corrosion-resistant screws or nails. Overlap joints with fiberglass mesh tape and apply a thin-set mortar.
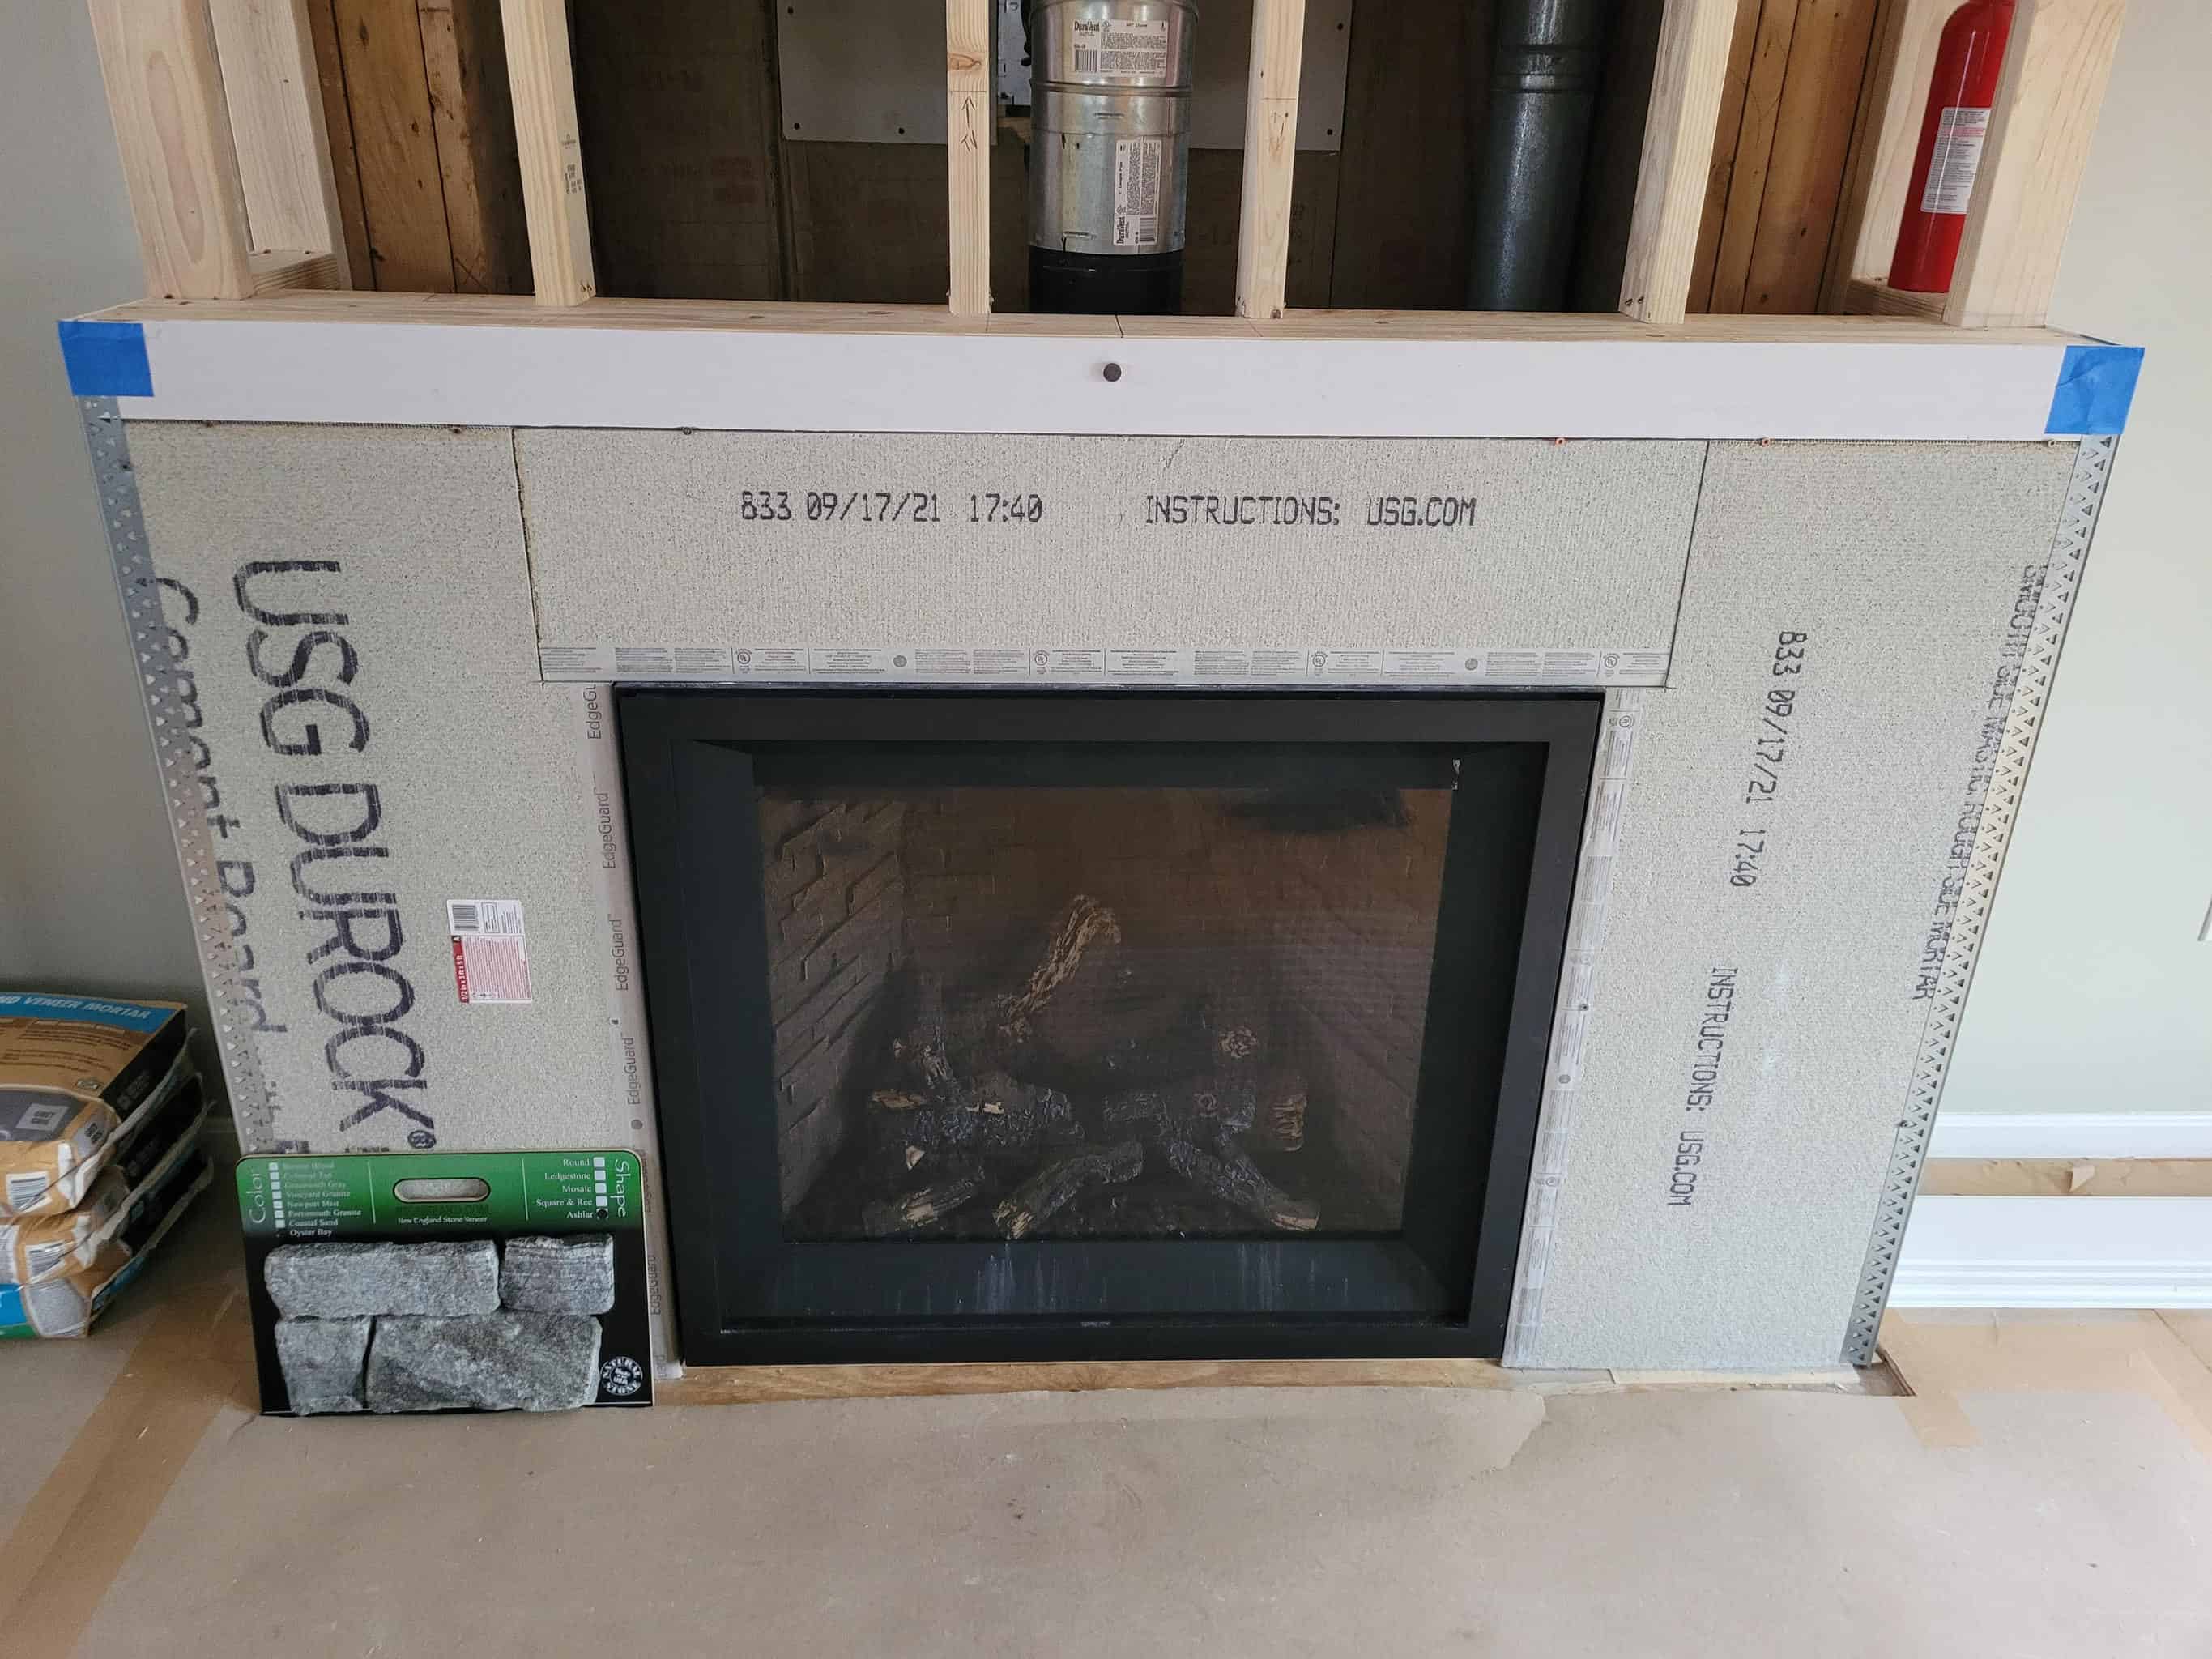
Durock is a brand of cement board used as a base for tile in wet areas like showers, bathrooms, and floors. It provides durability and mold resistance, crucial for high-moisture environments. Installation requires precision and attention to detail to ensure a water-resistant and long-lasting finish.
Properly installing Durock can prevent costly water damage and extend the life of your tiled surfaces. This introduction to Durock installation serves as a straightforward guide, simplifying the process for both DIY enthusiasts and professional contractors. With the right tools and techniques, anyone can achieve a sturdy and protective backing for their tiling project.
Introduction To Durock
Durock is a brand synonymous with quality and durability in the world of backer boards. As a cement board, it’s a critical component for moisture-prone areas, ensuring that surfaces remain stable and water-resistant. Suitable for both professionals and DIY enthusiasts, installing Durock can extend the longevity of tile work and add value to your property.
The Benefits Of Choosing Durock
Opt for Durock and enjoy:
- Mold and Moisture Resistance: Perfect for wet areas, repelling mold for a healthier habitat.
- Superior Strength: High impact resistance supports heavy tiles and finishes.
- Adaptability: Compatible with a variety of flooring types and applications.
- Easy Installation: Simple to cut and fasten, saving time and effort.
Identifying The Ideal Applications For Durock
Durock excels in:
| Application | Benefits |
|---|---|
| Bathrooms | Waterproof foundation for tiles. |
| Kitchens | Supports counters and backsplashes. |
| Floors | Stable base for tile flooring. |
| Outdoor Areas | Endures harsh weather. |
Credit: stoneyard.com
Tools And Materials
Welcome DIY enthusiasts! Ready to tackle installing Durock in your next home improvement project? Before diving in, it’s crucial to have the right tools and materials on hand. This guide will detail everything you need, ensuring a smooth and efficient installation process. Get your gear ready; we’re about to lay the foundation for a successful Durock installation!
Essential Tools For Installation
A well-prepared toolbox is key for a flawless Durock installation. Make sure you have the following tools:
- Measuring Tape: Accurate measurements are vital.
- Utility Knife: For cutting Durock to size.
- Screw Gun or Drill: Fastens Durock securely.
- Masonry Bit: Needed if drilling into concrete.
- Notched Trowel: Helps spread adhesive evenly.
- Level: Ensures your surface is even and true.
- Chalk Line: Creates straight, guideline marks.
- Carbide-tipped Scoring Tool: Easily score Durock for clean breaks.
Keep all these tools within arm’s reach before starting your project.
Materials Needed Before You Start
Alongside the right tools, gathering all necessary materials beforehand is essential.
| Material | Use |
|---|---|
| Durock Cement Board | The main material for your project. |
| Alkali-Resistant Screws or Nails | For fastening Durock to studs or floor joists. |
| Fiberglass Mesh Tape | To reinforce seams between boards. |
| Thin-set Mortar | Adheres Durock when laying over subfloors. |
| Joint Compound | For seamless board transitions. |
| Waterproofing Membrane | Essential in wet areas for moisture protection. |
This list ensures you’ll be ready to go with no interruptions.
Preparation Steps
Before diving into the world of Durock installation, proper preparation is key. These initial steps set the foundation for a successful project. From cleaning the installation area to accurately measuring and cutting the Durock sheets, each phase is critical. Follow these guidelines to ensure your workspace is ready for the task at hand.
Cleaning And Prepping The Area
Start with a clean slate. Clear the installation area of debris, dust, and loose particles. Use a vacuum or a damp cloth to capture any remaining dust.
Ensure the surface is flat and even. Address any irregularities before laying the Durock. This step is vital for a smooth, long-lasting finish.
Measuring And Cutting Durock To Fit
Accurate measurements are the backbone of a proper fit. Grab your tape measure and a marker to outline the needed Durock dimensions.
- Measure the installation area twice to confirm.
- Mark the Durock with a straightedge to guide your cuts.
- Use a carbide-tipped scoring tool to score the panel.
- Break the Durock neatly along the scored line.
- For curved cuts, a jigsaw fitted with a masonry blade works best.
Well-cut Durock panels eliminate gaps and ensure a tight, cohesive layout.
Installing Durock
We often overlook our walls and floors until they need an upgrade. Installing Durock is a sturdy choice for those areas exposed to moisture, like bathrooms and kitchens. Let’s dive into how you can install Durock and ensure your surfaces are waterproof and ready to handle anything.
Mixing And Applying The Mortar
Getting the mortar right is crucial for a secure Durock installation. Follow these steps to mix and apply mortar correctly:
- Pour dry mortar mix into a bucket.
- Add water gradually while mixing.
- Achieve a peanut butter-like consistency.
- Spread an even layer using a notched trowel.
Laying Durock Sheets Properly
Proper placement of Durock sheets ensures a solid base. Keep these tips in mind:
- Measure your space to cut sheets to size.
- Start from one corner, laying sheets staggered.
- Leave a small gap between sheets for expansion.
- Check levels as you lay each sheet on the mortar.
Securing The Panels With Screws
Securing Durock panels with screws is the final step to ensure they stay put. Here’s how:
- Use corrosion-resistant screws.
- Space screws 8 inches apart, avoiding the edges by ½ inch.
- Sink screws just below the surface without breaking the panel.
Finishing Touches
Once the Durock is securely installed, it’s not quite time to rest. The finishing touches ensure durability and a professional look. The seams need special care. Surfaces require a smooth finish. Effective waterproofing is crucial. Follow these steps for a flawless Durock installation final phase.
Taping And Mudding The Seams
Creating a strong, uniform surface involves taping and applying joint compound to the Durock seams.
- Start by spreading joint compound along each seam with a 6-inch knife.
- Press fiberglass mesh tape firmly over the compound on all seams.
- Apply a second layer of compound, smoothing it out 8-12 inches from the seam.
- Let dry for 24 hours, then apply a final coat, feathering the edges for a seamless look.
Sanding For A Smooth Finish
Fine sanding leads to a smooth, even surface for any finish or tile application.
- Use 150-grit sandpaper or a sanding sponge after the compound dries.
- Gently sand the surface in a circular motion until smooth.
- Remove all dust with a damp cloth to prepare for painting or tiling.
Tips For Waterproofing
Ensure a waterproof barrier in moisture-prone areas to protect against water damage. Here’s how:
| Step | Action |
|---|---|
| 1 | Apply a waterproofing membrane over the surface of the Durock, especially in showers and bathrooms. |
| 2 | Use sealant around edges and where Durock meets fixtures. |
| 3 | For extra protection, add a second coat of waterproofing, following the manufacturer’s instructions. |
Credit: www.youtube.com
Maintenance And Upkeep
Durock is a reliable brand for cement backer boards used in tile installations. Proper maintenance and upkeep are crucial for prolonging its lifespan. This part of the blog focuses on the essential steps to keep your Durock installation in top-notch condition. Simple, regular care prevents damage and preserves the integrity of your tiled area.
Routine Checks And Cleaning
Consistent examination and cleaning are the keys to maintaining your Durock installation. Dirt and moisture can harm its surface over time. Follow these steps to keep your Durock looking fresh and functional:
- Inspect the Durock surface for cracks or chips every few months.
- Clean spills immediately to prevent staining or moisture damage.
- Use a soft brush or cloth and mild detergent mixed with water for cleaning.
- Rinse the area thoroughly with clean water after washing.
- Dry the surface with a clean, soft towel to remove any residual moisture.
Dealing With Wear And Tear
Durock is tough, but it’s not indestructible. Over time, it may show signs of wear and tear.
| Action | Method |
|---|---|
| Repairing Cracks | Fill small cracks with silicone caulk and smooth out the surface. |
| Sealing | Apply a waterproof sealant yearly to prevent water damage. |
| Replacing Sections | If damage is extensive, replace the affected section of Durock. |
Prevent further damage by addressing issues immediately. Regular maintenance ensures the longevity and durability of your Durock installation.

Credit: www.fourgenerationsoneroof.com
Frequently Asked Questions Of How To Install Durock
What Is Durock Used For In Construction?
Durock is a brand of cement backer board used as a moisture-resistant substrate for tile and stone in bathrooms, showers, and floors. It’s a durable surface for wet areas, preventing water damage to walls and floors.
Can Durock Be Used For Outdoor Projects?
Yes, Durock is suitable for outdoor projects. It’s weather-resistant and can withstand exposure to the elements, making it a strong choice for outdoor kitchens, patios, and exterior walls under tile or stone finishes.
How Do You Prepare Surfaces For Durock Installation?
Surface preparation involves cleaning the area, ensuring it’s smooth and flat. Remove dust, debris, and any loose material. For floors, check that they are level. Walls should be plumb and even before installing Durock.
What Tools Are Needed To Install Durock?
You’ll need a utility knife, tape measure, T-square, screws or nails designed for backer board, a drill or hammer, and a carbide-tipped scoring tool. For cutting, consider a jigsaw or circular saw with a carbide-tipped blade.
Conclusion
Successfully installing Durock in your space amps up both durability and moisture resistance. With the right tools and step-by-step guidance, your DIY project should now be well within reach. Remember to measure accurately, cut precisely, and secure everything firmly. Take pride in your handiwork and enjoy the solid foundation you’ve built for your tile installations.


