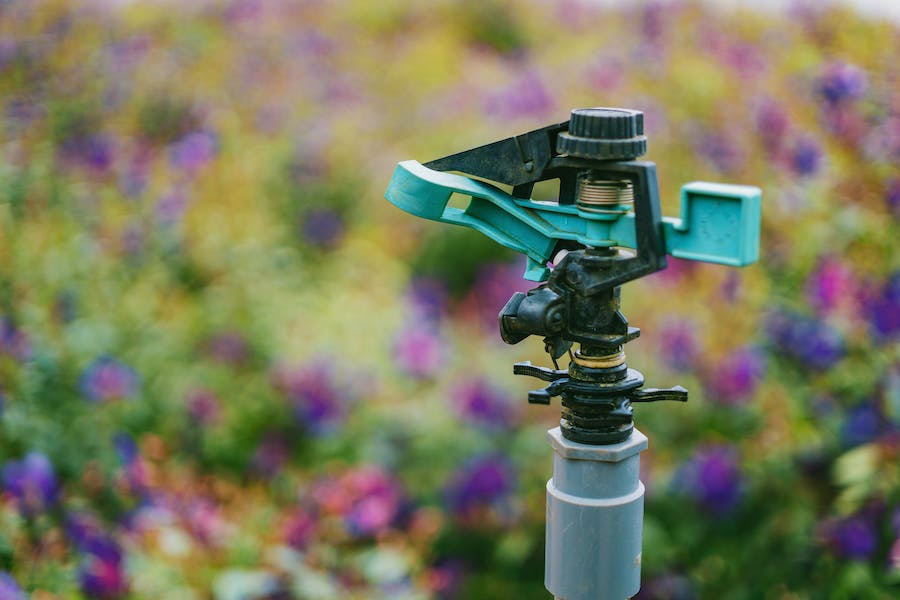
To adjust the distance on a sprinkler head, turn the screw at the tip or twist the collar. This controls the water flow and spray radius.
Ensuring your lawn and garden receive adequate water involves more than just routine sprinkling; it requires precise control over your irrigation system. Adjusting the sprinkler head distance is a vital step in optimizing water usage and coverage. Homeowners and garden enthusiasts often overlook this simple yet critical task, leading to either overwatered patches or dry spots in their yards.
Tailoring the spray distance of your sprinkler heads can help maintain a lush, green landscape while conserving water. A well-managed irrigation system not only benefits plant life but is also a cost-effective practice, reducing waste and unnecessary water bills. With the right tools and a few minutes of your time, you can easily adjust your sprinklers to ensure your garden’s health and vibrancy.
Water Wisdom: Priming Your Sprinklers For Peak Performance
Keeping your garden lush and green is an art paired with a bit of science. A key part of the science aspect involves optimizing your sprinkler system. This guide helps you adjust sprinkler head distance, ensuring your plants get the right amount of water without waste.
Sprinkler Types And Their Range
Different sprinkler heads come with varying ranges. Knowing your type helps you make precise adjustments.
- Fixed Spray Heads – Ideal for small areas, throwing water up to 15 feet.
- Rotors – Suitable for larger areas, with a reach of 15 to 50 feet.
- Impact Rotors – They cover even larger areas up to 150 feet.
Match your sprinkler type to the area you’re watering. Adjustments ensure every inch gets the right moisture.
Importance Of Proper Adjustment
Incorrect settings lead to overwatering and underwatering. Adjust for uniform coverage and water conservation.
- Save water – Proper settings reduce excess use.
- Reduce bills – Less water means lower water bills.
- Protect plants – Correct distances prevent water stress.
Performance peaks when you tailor adjustments to your landscape’s needs. Check and adjust seasonally or as your garden grows.
Before You Begin: Pre-adjustment Checklist
Ensuring your lawn receives the right amount of water starts with correctly adjusted sprinkler heads.
Preparation is key to a successful adjustment.
So, let’s get your sprinklers working efficiently with this simple pre-adjustment checklist.
Safety First: Turning Off The Water
Before touching your sprinkler system, it’s crucial to turn off the water.
This prevents any accidents and makes adjustments easier.
Find the main valve and shut it off to ensure a safe working environment.
Gathering The Right Tools For The Task
Having the right tools on hand simplifies the process.
You’ll need a few essentials:
- Flathead screwdriver: For adjusting spray patterns and distance.
- Plunger (or rotor) tool: Specifically for rotor-type sprinklers.
- Ruler or measuring tape: To measure spray distance accurately.
- Protective gloves: Optional, yet helpful to keep your hands clean.
Step-by-step: Adjusting Spray-type Sprinkler Heads
Welcome to the essential guide on adjusting spray-type sprinkler heads. Keeping your lawn green and hydrated involves precision, and tinkering with your sprinkler heads is key. Learn how to manage the spray pattern and the distance your sprinkler heads cover with these clear, straightforward steps.
Tweaking The Spray Pattern
To change the spray pattern, start by examining your sprinkler head. Most have an adjustable notch on the nozzle. Rotate this notch to shape the spray according to your garden’s needs. Here’s how:
- Locate the adjustment screw on the head of the sprinkler.
- Use a small flathead screwdriver for turning.
- Turn clockwise to narrow the spray pattern.
- Turn counter-clockwise to widen the pattern.
Test the new setting and re-adjust until you achieve the perfect coverage.
Altering The Distance Of Water Throw
To modify the distance your sprinkler throws water, find the adjustment screw at the tip of the nozzle. This requires small adjustments. Follow these steps for precise control:
- Turn the system on and observe the current distance.
- While the system is running, use a screwdriver to access the screw located in the center of the nozzle.
- To decrease the throw, turn the screw clockwise.
- To increase, turn it counter-clockwise.
Make small turns and observe changes closely. Continue to adjust until the desired distance is achieved. Always ensure not to overextend the sprinkler’s capability, as it can lead to uneven watering.
Gear-driven Rotors: Fine-tuning For Coverage
Gear-driven rotors are key in sprinkler systems for lawns and gardens. They help cover large areas with water. Proper adjustment of these rotors ensures every part of your garden gets the right amount of water. Let’s fine-tune your gear-driven rotors to make sure they spray efficiently. Here’s how to adjust the arc and the radius of your sprinkler heads.
Adjusting The Arc For Even Coverage
To get an even spread of water, you need to adjust the arc. The arc is the angle that the water sprays over. Here’s how:
- Turn off the system. Make sure the water is not running.
- Find the adjustment screw. It’s on top of the sprinkler head.
- Use a screwdriver. Insert it into the adjustment socket.
- Twist to adjust. Turn clockwise to decrease the arc. Turn counterclockwise to increase it.
- Check the angle. Make small adjustments and watch the angle change.
Setting The Radius For Distance Control
Control how far water shoots out with radius adjustments. Here’s a step-by-step guide:
- Locate the radius adjustment screw. It’s on the sprinkler head.
- Use a flat-head screwdriver. Carefully place it into the screw.
- Turn to set the distance. Twist clockwise to shorten the spray. Go counterclockwise to lengthen it.
- Make small changes. Adjust a little at a time and check the spray.
Properly adjusted gear-driven rotors save water and keep your garden healthy. Turn your system into a water-efficient marvel today!
Troubleshooting Common Issues
Maintaining a lush garden requires a well-functioning sprinkler system. Adjusting sprinkler head distance is part of that. Sometimes sprinklers act up. Let’s fix common problems together.
Dealing With Low Water Pressure
Low water pressure can make your sprinklers weak. They won’t reach far. Here’s what to do:
- Check the main valve. Make sure it is fully open.
- Inspect for leaks in the irrigation system.
- Clean filters in sprinkler heads.
- Adjust the flow control knob for better pressure.
A pressure gauge helps. Install it to monitor your system’s pressure.
Unclogging And Maintaining Sprinkler Heads
Dirt and debris clog sprinkler heads over time. This restricts water flow. Here’s a maintenance routine:
- Turn the system off.
- Remove the sprinkler head.
- Rinse the filter under clean water.
- Use a small wire to clear debris from nozzles.
- Reassemble and test the sprinkler head.
Regular checks keep your system in top shape. Your garden stays beautiful.

Credit: www.waterpumpsdirect.com
Watering Wisely: Eco-friendly Practices
Gardens flourish with proper care, but our planet beckons for mindful watering.
Eco-friendly practices ensure gardens remain lush while conserving water. Adjusting sprinkler head distance plays a vital role.
Understand how to water efficiently, and your garden will thrive without waste.
Optimizing Water Usage
To begin, determine the type of sprinkler heads installed. Different models require varied adjustments for optimum coverage. Here’s a straightforward guide:
- Rotary heads: Twist the screw atop the head to adjust distance.
- Fixed spray heads: Use a flat-head screwdriver on the screw for control.
- Impact rotors: Regulate the diffuser pin and distance control dial to modify spray.
Regular checks are essential for peak performance. Replace any broken or worn parts immediately.
Scheduling For Soil Absorption
Timing is crucial. Set your sprinkler to work early in the morning. Less wind and cooler temperatures reduce evaporation.
Study your soil type. Clay soils require slower water rates; loamy soils can handle more. Conduct an easy test: Water for 15 minutes, then check how deep it soaked.
Match your watering schedule accordingly for deep, infrequent soaks.
Utilize smart controllers that monitor weather conditions. They adjust water schedules based on real-time data, delivering a sustainability edge to your garden care.
Frequently Asked Questions On How To Adjust Sprinkler Head Distance
How Do You Adjust The Range On A Sprinkler Head?
To adjust a sprinkler head’s range, turn the radius adjustment screw clockwise to decrease or counterclockwise to increase the spray distance. Ensure the sprinkler is off while making adjustments.
How Do You Adjust The Distance Orbit On A Sprinkler Head?
To adjust the spray distance on a sprinkler head, turn the screw on the tip clockwise to decrease the range, or counterclockwise to increase it. Make small adjustments until you achieve the desired distance. Ensure the sprinkler is off while making changes.
How Do I Shorten The Distance Of My Sprinkler Head?
To shorten the sprinkler head distance, turn the screw located on the top of the head clockwise. This adjusts the spray pattern, reducing the throw. Always ensure the system is off before making adjustments for safety and accuracy.
How To Adjust The Spray Distance On A Rainbird Sprinkler Head?
Turn the Rainbird sprinkler head clockwise to decrease and counterclockwise to increase spray distance. Use a flat-head screwdriver to adjust the screw at the top for finer control.
Conclusion
Mastering sprinkler head adjustment is key to a lush, well-watered garden. By following the steps outlined, your lawn will get the right amount of hydration. Remember to routinely check and calibrate your sprinklers for optimal performance. With these tips, a perfectly watered landscape is within reach.
Happy gardening!


