To make a cutting board without a planer, use sanded, flat lumber and a thorough sanding process. Employ wood clamps, a saw, sandpaper, and food-safe oil for finishing.
Crafting a homemade cutting board brings a touch of personalization to any kitchen, and even without advanced tools like a planer, you can create a durable and attractive cutting board with basic woodworking tools. Choosing the right wood is essential; opt for hardwoods like maple, walnut, or cherry for their durability and aesthetic appeal.
Sanding takes precedence in this process, ensuring a smooth, even surface that will protect your knives and make for easy cleaning. Properly clamping the wood while cutting and gluing will keep the pieces aligned and secure. Finishing with a coat of food-safe oil seals the wood, enhancing its natural grain and ensuring longevity. By following these steps, not only will you have a functional kitchen tool, but also a handmade piece that could serve as a meaningful gift or a seller in a craft market.
Choosing The Right Wood For Your Cutting Board
Embarking on the journey to craft a personalized cutting board is exciting!
Choosing the right wood is crucial for the success of the project.
Factors To Consider
- Hardness: Softer woods can damage easily.
- Toxicity: Some woods have harmful oils or toxins.
- Grain density: Tight grains prevent bacteria growth.
- Water resistance: Woods that repel moisture last longer.
- Availability: Exotic woods can be hard to find.
- Cost: Choose a wood that fits your budget.
Best Types Of Wood For Durability And Aesthetics
| Wood Type | Pros | Cons |
|---|---|---|
| Maple | Durable, antibacterial | Can be pricey |
| Walnut | Rich color, resilient | May darken over time |
| Cherry | Beautiful, self-healing | Softer than other hardwoods |
| Teak | Natural oils, water-resistant | Harder to work with |
| Bamboo | Eco-friendly, tough | Varying quality |
Gathering Your Tools And Materials
Welcome to your DIY journey of crafting a cutting board right at home! Before diving into the creation process, it’s crucial to gather the right tools and materials. This guide ensures you have everything you need on hand, making the project smooth and enjoyable. Let’s start by detailing the essential tools required for this task.
Essential Tools List
Having the right tools is key to the success of your cutting board project. Here is what you’ll need:
- Saw: A hand saw or circular saw for cutting wood to size.
- Sanding Block: For smoothing the wood surfaces.
- Clamps: To hold the wood pieces firmly while they bond.
- Wood Glue: A strong adhesive for joining wood pieces.
- Square: To check the corners for a perfect 90-degree angle.
- Measuring Tape: For accurate measurements of wood pieces.
- Pencil: To mark cuts and measurements on wood.
- Chisel: For cleaning up any glue that squeezes out.
Additional Supplies Needed
Beyond tools, here are extra supplies to have before starting:
- Hardwood boards for the cutting board surface.
- Non-toxic mineral oil for finishing the board.
- Clean rags for oil application.
- Food-safe wax for additional sealing and protection.
Safety Gear Recommendations
Your safety is paramount during this project. Here’s what you’ll need:
| Item | Use |
|---|---|
| Safety Glasses | Protects your eyes from dust and debris. |
| Dust Mask | Prevents inhalation of sawdust. |
| Hearing Protection | Safeguards your ears from loud tool noises. |
| Work Gloves | Keeps your hands safe from splinters and cuts. |
Equip yourself with these tools, supplies, and safety gear to start your cutting board project confidently and safely. With everything ready, you’re set to create a beautiful and functional kitchen staple.
Preparing The Wood Before Planing
Crafting a cutting board without a planer starts with wood preparation. This crucial step ensures a smooth, even surface. It helps create a strong, stable cutting board. Let’s begin by cleaning, sanding, and properly cutting the wood.
Cleaning And Sanding The Surface
First, remove dirt and debris from your wood. Use a soft brush or dry cloth to wipe the surface. Then, start sanding with coarse grit sandpaper. Move towards finer grits for a smooth finish. Remember to sand along the wood grain. This step is critical for a flat, even surface.
- Brush off sawdust between sanding.
- Wipe the wood with a damp cloth after sanding.
Aligning Wood Grains And Patterns
Aligned grains make a stronger, more beautiful board. Lay out your wood pieces. Look for similar grain patterns. Position them in a way that seems natural. This step prevents warping. It enhances the board’s durability.
| Step | Detail |
|---|---|
| 1 | Sort wood by grain similarity. |
| 2 | Arrange aesthetically. |
Cutting To Size With Accuracy
Measure your board’s final dimensions. Mark your wood pieces using a straight edge. Use a saw for precise cuts. Double-check measurements before cutting. Measurement accuracy is vital. It ensures the board pieces fit together perfectly.
- Mark with a pencil for visibility.
- Re-measure to confirm size.
- Use a sharp blade for clean cuts.

Credit: www.instructables.com
Assembling The Cutting Board
Once you have all your wood pieces prepared, it’s time to put them together. Carefully aligning the pieces will result in a smooth, even surface for your cutting board. This stage is crucial to creating a functional and beautiful board. Let’s get into the details of connecting everything securely.
Gluing The Wood Pieces Together
Start by choosing a strong wood glue. Lay out your pieces on a flat surface. Apply glue to the edges that will join together. Spread the glue evenly with a small brush for a tight bond.
Using Clamps For Even Pressure
After gluing, clamps are your best friend. Clamps apply pressure to keep everything in place while the glue sets. Place clamps along the edges at even distances. Avoid gaps and raised edges. Make sure to clean any excess glue immediately with a damp cloth.
Drying Time And Conditions
Glue requires time to set properly. Trust the glue label for specific drying times. Control temperature and humidity where your board dries. An undisturbed, dry, and cool area works best. Don’t rush this part. Drying might take overnight.
Finishing Touches By Hand
Embarking on the journey of creating a homemade cutting board brings us to the crucial stage of finishing touches by hand. This stage is all about refining the cutting board to perfection. Now, let’s explore the hand-crafted excellence needed to give your board that professional edge without a planer.
Hand Sanding Techniques
Hand sanding is a pivotal step in smoothing out your cutting board. Begin with a lower grit sandpaper, such as 80 or 120 grit, which helps remove rough areas and minor imperfections.
- Always sand in the direction of the wood grain.
- Rub evenly across the surface.
- Progress to higher grits, like 220 or 320, for a finer finish.
After each sanding phase, wipe the board down with a tack cloth to remove all dust.
Applying Food-safe Finishes
Safe finishes are integral for a cutting board’s longevity and safety. Choose options like beeswax, mineral oil, or a combination of both.
- Apply the finish with a clean, soft cloth.
- Work the finish into the wood in a circular motion.
- Allow to soak in, then wipe off excess with a clean cloth.
Repeat periodically to maintain the board’s protective layer and luster.
Hand Burnishing For A Smooth Surface
Burnishing compresses wood fibers for an ultra-smooth finish. Use a piece of hardwood or a burnishing tool to rub the board’s surface firmly.
Key tips:
- Rub briskly and with consistent pressure.
- Give special attention to edges and corners.
- Continue until the surface feels glass-smooth.
This method also enhances the wood’s natural beauty, completing your project with a craftsman’s touch.

Credit: diyhuntress.com
Caring For Your Homemade Cutting Board
Your homemade cutting board is not just a kitchen tool. It’s a piece of handcrafted art. Like all valuable items, it requires proper care to last a long time. Follow these tips to keep your cutting board looking as good as new.
Daily Maintenance Tips
Keep it clean and dry to prevent bacteria growth. After use, wash with hot, soapy water, rinse well, and dry thoroughly. Avoid soaking the board as it can lead to warping.
- Wipe down with a damp cloth
- Avoid abrasive cleaners
- Store in a cool, dry place
Preventing And Treating Warps And Cracks
Stability is crucial for cutting boards. Warps and cracks can make them unreliable. A balanced moisture level keeps the wood straight.
- Avoid extreme temperatures
- Use food-grade mineral oil to treat the wood
- Apply the oil once a month or when the wood looks dry
If your board does warp, lay it flat with a heavy object on top for 24 hours. For small cracks, food-safe wood filler can repair them. Ensure thorough drying before using the board again.
When To Reapply Finish
When the board loses its luster or feels rough, it’s time to reapply finish. Wait for signs of dryness or after cleaning it from heavy use.
Choose food-grade oils like mineral or beeswax for finishing.
| Signs | Action |
|---|---|
| Loses shine | Apply oil |
| Feels rough | Sand lightly, then oil |
| Dry to touch | Oil immediately |
Reapply every one to three months, depending on use.

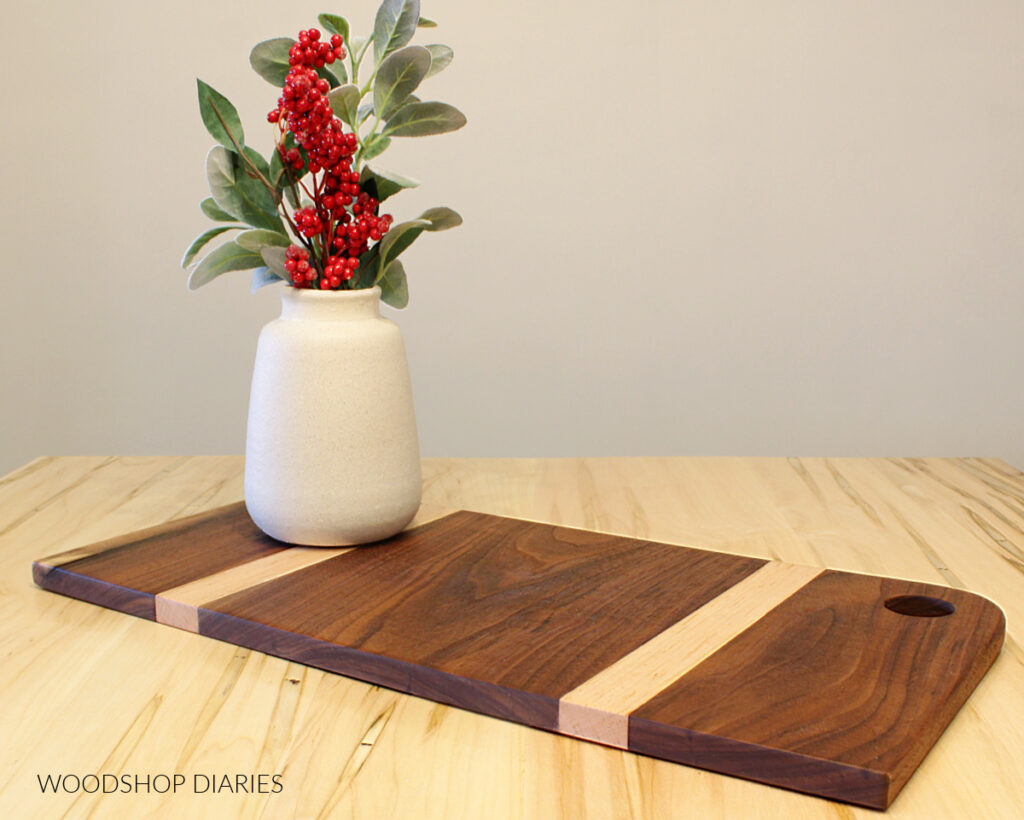
Credit: www.woodshopdiaries.com
Frequently Asked Questions Of How To Make A Cutting Board Without A Planer
What Can I Use If I Don’t Have A Planer?
Use a hand sander or sandpaper for smaller projects. For larger wood pieces, a power sander or a hand plane can substitute for a planer.
How Do You Make A Cutting Board Without A Planer Or Jointer?
Select straight-grained wood and cut to size. Sand surfaces progressively with coarse, medium, and fine-grit sandpaper. Glue boards edge-to-edge, clamp tightly, and let dry. Trim edges with a saw for uniformity. Finish with food-grade mineral oil for protection.
What Can I Make A Cutting Board Out Of?
You can make a cutting board from wood, bamboo, plastic, or composite materials. Each type offers distinct benefits and maintenance requirements.
Do You Need A Jointer To Make Cutting Boards?
A jointer is not essential for making cutting boards, but it helps ensure flat, square edges for better glue-ups and a professional finish.
Conclusion
Creating a cutting board sans planer can be both rewarding and economical. It demonstrates that with creativity and basic tools, you can achieve professional results. Remember, patience and attention to detail are key. Start your project today and step into the world of DIY craftsmanship with confidence and enthusiasm.
Your custom cutting board awaits!


